Allez les Bleus!

No, I'm generally not a sports fan. And no, I'm not French.
But how can I not support France in the Rugby World Cup? Especially after last week's miraculous surprising win against New Zealand!

Sometimes my husband and I sit around and think about five years ago, when we were still living in the States, and how much things have changed and how we're doing things we never envisioned. "Five years ago, who would have thought that I would be getting paid to write about food?" "Five years ago, who would have thought that I'd have a radio show?''
He summed up the rugby situation Saturday night by saying this, "Five years ago, who would have thought that you would care about a rugby score!"

Alles les Bleus!!!

Photo du Jour - Blue


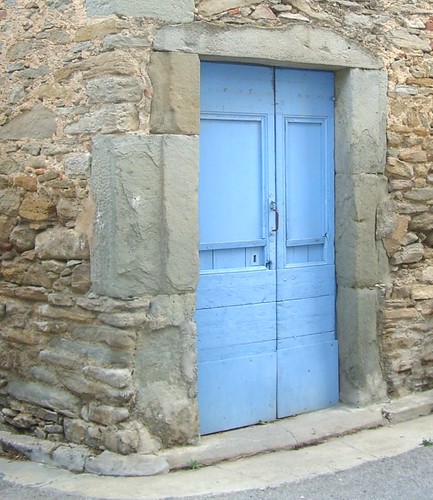
That certain shade of blue that I see everywhere in the south of France.

Bali Adventures

Yesterday it was 6°C (43°F) in Paris.  Today,  I'm in Bali with 30°C (86°F)  temperatures and 95% humidity.  (It took 25 hours door to door, by the way, in case you're wondering...)

I usually drone out the noise of traffic , sirens, and the occasional drunk before falling asleep in Paris.  Here the sounds are much different - high winds and monsoon rain storms at the moment, tropical birds, or intense waves crashing against the beach.  I am a world away.

Join me on this adventure over the next four weeks.  More than anything, I hope to share new food discoveries from Indonesia.  I have no doubt there will be plenty!  And I never would have imagined coming here like this...

/dma


Tropical Muffins: Recipe


Have you discovered cocoa nibs? If you've been on the Shafffen Berger chocolate factory tour then you probably tried them and maybe even purchased some. But if you're like me, you probably haven't had many good ideas of what to do with them.

Cocoa nibs are the tiny bits of roasted cocoa beans that are used to make chocolate. They are ground into a paste with sugar to make chocolate bars and confections. But when in the nib form they are unsweetened, crunchy, nutty and chocolate-y without being too bitter. The are great in recipes that call for nuts. So far I have only used them in some biscotti I made a while back.

Coming home from Hawaii I thought about making some recipes using the kinds of tropical flavors that I enjoyed in baked goods over there, especially bananas and coconut. But then it occurred to me to use vanilla and coco nibs which are grown in the tropics too.

These muffins are deliciously tropical and at the same time fairly healthy. Pureeing the bananas makes the muffins moist without using too much fat. I like adding a pinch of nutmeg, which you won't really be able to identify in the final muffin, but I think enhances the flavor.

Note: you can buy cocoa nibs online if you can't find them in a gourmet store near you. You could also substitute chopped nuts or leave them out altogether.

Tropical Muffins
makes 10 muffins

1 cup flour
1/2 cup oats (old-fashioned or quick)
1/4 cup packed brown sugar
1 Tablespoon baking powder
pinch salt
pinch nutmeg
2 Tablespoon shredded coconut
2 Tablespoon cocoa nibs

1 teaspoon vanilla
1/3 cup milk
1 egg
1 Tablespoon cooking oil
1 banana, cut up

1 Tablespoon shredded coconut for sprinkling on top of muffins

Preheat the oven to 375 degrees. In a mixing bowl stir together the flour, oatmeal, brown sugar, baking powder, nutmeg, and salt. Set aside. Lightly coat muffin pan with cooking spray or use liners (my preference). In a blender combine milk, egg, banana, vanilla and oil. Blend until smooth. Combine wet and dry ingredients, including the nibs and coconut, and stir just until moistened. Fill muffin pans until almost full and sprinkle tops with additional coconut. Bake for about 12-15 minutes or until a wooden skewer inserted in center comes out clean. Cool muffins on a rack.

Enjoy!

What's dat?


Dine About Town! It's back! I'm really enthusiastic about this promotion because it's just the kick in the pants I need to get me to try some new restaurants or revisit some favorites.

So what exactly is Dine About Town? It's a promotion where in the month of January various San Francisco restaurants offer a 3-course lunch for $21.95 and/or dinner for $31.95. Not exactly cheap, but many of the restaurants on the list are quite pricey ones so it does represent a discount. There is also a VIP gift kit if you stay in a San Francisco hotel during the month of January, check out the web site for more details.

Some of the restaurants I am putting on my list to eat at this month include:
Zuppa--brand new, South of Market, getting good reviews, high on my list
Tablespoon--right down the block from my house, but I've never been there
Jack Falstaff--I have wanted to go ever since interviewing the wine director last year

Last year I ate at 1550 Hyde and RNM and loved them both. Check out last January 2005 in the Archives to read my reviews. Last night I revisited 1550 Hyde and the food was wonderful. I had a delicious antipasto platter with homemade pate, salami, and chantarelles. For an entree I had the heritage berkshire pork ribs with white wine, tomato and balsamic with bloomsdale spinach and soft polenta. This was a perfect Winter menu, the ribs melted off the bone and the spinach was tender, the polenta creamy and sweet. For dessert a caramelized pear tart with a Reisling ice cream.

Also worth noting, the wine list at 1550 Hyde is so good it has been honored by Food & Wine magazine, it features lots of inexpensive and interesting options. I enjoyed the 2004 Kurt Angerer Gruner Veltliner which was crisp with lots of green apple tones and a 2003 Capitel della Crossara Vapolicella Classico "ripasso" which was very well-balanced, with notes of anise, dried fruit and violet.

Ripasso is the technique that uses the unpressed skins or "lees" for Amarone, this makes it more robust, but not necessarily expensive, our bottle was only $26. A big thanks to Gastronomie for the delightful company and the lesson in Valpolicella!

Off to Lafitte & light lunch!


I was listenting to a podcast of Good Food (see my favorite links) as I was returning from shopping at the local market. I had bought French Green Beans that lookd sooo fresh (they had been picked the day before) among other green treats while I was listenting to a LA chef who was talking about how good green beans were this season! THey are good over here too and these are for you, simply steamed and with a branch of rosemary for extra flavor!
Yesterday we had them steamed! I served them just warm and tossed with some olive oil and chopped garlic and parsely. Try them. You can prepare in the same way Yellow Beans or any VERY FRESH beans.
The following day (today) I sauteed the rest. Heat olive oil in a pan, add a sliced onion, let brown (I added 1/4 yellow bell pepper I had in the fridge from another preparation) then add two/three VERY RIPE tomates (best without the skin) and let cook 5 minutes (medium heat), then add the green beans and let cook 2 more minutes. Simple and delicous.
We're off to Lafitte for our Recreation French Country Vacation. I'll come back from Lafitte with more recipes.


Cooking for Easter: Part Five

It is a week after Easter Monday, so definitely about time to wrap up my "Cooking for Easter" series! When I learn more about posting photos, I should be able to do this type of subject in one fell swoop!

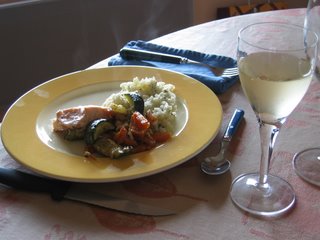
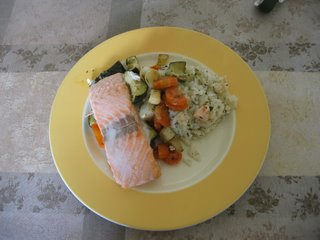
I haven't written much about our "protein" course, because I simply added salmon filets to the top of my honey-roasted vegetables 20 minutes before the end of the baking time. Salmon is in no way traditional French Easter fare, but I felt like something light to make the meal a celebration of spring.

Add a crisp white wine from Château de la Liquière -- one of my favorite Languedoc wines -- and à table!

Norwegian Kakemenn, Norwegian Cake Men

Kakemenn 3 (1 of 1)

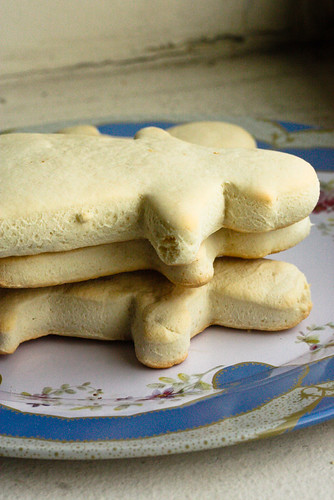
I think if R had to pick his most favorite holiday treat ever, and if he wasn't allowed to pick these Norwegian truffles, called konfekt, he would for sure go for kakemenn. This recipe comes from his best friend's mom, because they are exactly the ones he remembers from childhood. So kakemenn. What are those? They're thick, rolled out, and then cut-out, cookies. They're made from a dough that stays pretty cakey (appropriate, given their name) and honestly? They taste like the best, most delicious animal crackers you've ever had. Not dry like the prepackaged kind, but also not overly sweet. I think this last quality makes them very good candidates for a cookie tray crowded with overly cloying desserts.

Kakemenn 2 (1 of 1)

But it wouldn't be a Norwegian recipe without at least one hard-to-find ingredient if you live in the US. These cookies are made with hornsalt, instead of baking powder. Hornsalt is also called baker's ammonia, and is a leavener whose flavor evaporates out of the baked good, and is supposed to be great for its texture. However, since it starts out imparting the taste of ammonia to the food, you can forget about sampling your cookie dough. And if you need to clear out your sinuses, one whiff of hornsalt should do the trick.

Kakemenn (1 of 1)

For the decorating, which we couldn't do before R had polished off more than half of them, it's traditional to simply paint them with a brush and food coloring, or to leave them white. Since I spent so much time tracking down coconut oil for this recipe, I ran out of time to get paint brushes. But I think they're charming enough as is. The recipe below makes a ton of cookies. Seriously, a ton. It can easily be halved.

Norwegian Kakemenn (and women, and dogs)
Friend of the Family's recipe

1/2 liter of water
30 grams of hornsalt
100 grams of unsalted butter, melted
750 grams of sugar
1.5-2 kilos flour

Put the melted butter in a medium bowl and add the water. Mix in the sugar and hornsalt, then add a little flour at a time, mixing, until the dough comes together in a ball. It will be a bit sticky. You may not use all of the flour, depending on the conditions.

Wrap the dough ball and refrigerate for twelve hours. After this time, remove from the refrigerator and allow to warm up a little bit on the counter.

Preheate the oven to 425F. Put parchment paper over a couple of cookie sheets and set aside. Roll the dough out to about 1/8" and using cookie cutters cut shapes out of the dough. Put the cookies on the baking sheets and bake for about 8 minutes until lightly browned on the bottom and edges. Allow to cool, and decorate with food coloring used as paint if you want.

International Cookbook Roundup


Where would you like to go for the holidays? Italy? Spain? Japan? How about just transporting yourself through the creations in your own kitchen? There are several new exciting cookbooks that have just come out featuring the cuisines of these countries. All of these books will serve to break through the standard stereotype of cuisines that we think we know so well.

First off, Italy. When I learned to cook in Italy I did it the old-fashioned way. I observed home cooks in their element. Several of them in fact. I watched and took notes so I could replicate the dishes when I came back home. I also learned that each Italian cook has his or her own way of making recipes their own. None of them used a cookbook. Needless to say, I can be very critical of Italian cookbooks!

Without a doubt, The Silver Spoon is by far the most comprehensive Italian cookbook I have ever come across. Over 2,000 recipes. Even if you don't follow the recipes exactly, this book will give you a good sense of how Italians cook. Unless you've spent some time in Italy in all four seasons, visiting all regions from the top of the boot to the tip, you may not know the variety of foods that are eaten in Italy. Swiss chard, lentils, pumpkin. You probably don't think of those as typical Italian food, but they are. This is a book that anyone serious about Italian food should own.

Not just one but two great Spanish books are worth reviewing. When traveling in Spain it's easy to eat the same things over and over again. Paella, gazpacho, tapas, flan. The Cuisines of Spain succeeds in showing the variety of regional cooking. The recipes are easy to follow and range from the simple Bread and Garlic Soup with Poached Eggs to the exotic Rabbit with Chestnuts. The book is organized by region. It is a beautiful coffee table style cookbook and a great gift to anyone with enthusiasm for Spain.

By comparison, The New Spanish Table, now available in paperback, is almost like a personal travelogue. Here you'll find similar recipes but with more stories attached. The recipes are organized by type of food rather than by region. More contemporary recipes are given equal status in this book. Interestingly both books come with glowing recommendations by Ferran Adria, the master of cutting edge Spanish cuisine. You really can't go wrong with either of them.

Finally an amazing Japanese cookbook, Washoku. This is a book about Japanese home cooking and a philosophy of harmony and balance in food. While an elegant book, the recipes are mostly of the more rustic variety. They use the healthy ingredients that the Japanese are known for, tofu, sea vegetables, fresh herbs, seeds, nuts and fish. In San Francisco both Medicine Eatstation and Maki serve some of these types of dishes. But this is the first cookbook I have seen that focuses exclusively on this style of cooking. It's a treat for the senses and will make you think about the food you eat in a new way. Do check it out.

Photo du Jour


Gorgeous door knocker.


Everyone's a critic. Especially a food critic. So maybe that's why professional food critics have such a hard time pleasing the public. When it comes to Michael Bauer, our own local food critic, I have this to say, one of my all-time favorite cookbooks was one he wrote, The Secrets of Success Cookbook (the recipe for Bizou/Coco500's fried green beans is in it, do I need to say more?).

I am also beginning to really enjoy Bauer's blog. This week his blog post Say Goodbye to Short Ribs hit the nail on the head. In terms of his predictions that pork belly and pork shoulder will turn up on menus near you, I agree and add marrowbones as another hot restaurant trend.

Ever go to the beach to find pottery shards? Me neither but Meathenge has a great post about it, well worth checking out.

I came across no fewer than three food blog posts and recipes for blueberry muffins this week. I agree with Elise that muffins can be tricky. My last batch of orange chocolate muffins did not rise to the heights I would have liked. Elise's recipe uses plenty of butter, but it really does look like a winner.

Photo du Jour


The verdant, tranquil gardens at le Relais de Camont.

New shapes for simple classics

Writing Cuisine Quotidienne has led me to think a bit more about how to present dishes. My small kitchen is in no way an artist's or photographer's studio, yet I do experiment with different forms and shapes.

Tomates-mozzarelle have become an extremely popular starter in France over the past ten years or so. I don't remember eating them at all in the early 1990s and am not sure I could even find mozzarella cheese in France at that point, when the even simpler "tomates-vinaigrette" dominated the summer salad scene.

Now tomates-mozzarelle are standard fare, so standard that we tire of them by late May -- except perhaps this year, as rain and cold have prevented us from moving into our usual summer culinary mode!

The usual presentation of this salad consists in alternating the tomatoes and the cheese on a large serving platter. Or when people are feeling really lazy, they just toss everthing together in a bowl.

To vary the dish's appearance, I sometimes present the whole tomatoes and cheese slices in "fans" as above, or serve the salad in individual glasses. Appearance does count for something, after all!

Do you have any variations on the tomato and cheese salad theme? Share them here...

Photo du Jour - Sunflowers


A hot summer's day.
Vibrant golden yellow flowers against blue shutters. Bees buzzing around lazily.
Relief from the heat in a cold glass of rosé.

In honor of the 4th of July

I do not post to this blog anymore and, to tell you the truth, I have plans to "put it down" io the near future. But I don't want to do that without a certain amount of pomp and circumstance, and at the moment, I don't have enough time to develop an appropriate farewell to Cuisine Quotidienne, which I imagine will take me several posts. It will have to wait until I get to the USA in four days!

For now, here's a little clin d'oeil to the 4th of July. I happen to quite like hot dogs, and think they're a nice occasional school night meal -- as long as they're served with a salad or two, or some veggies. And pains spéciaux pour hot dogs have finally arrived in my region of France!

I know it's culinarily incorrect, but I was happy to find them at my local EcoMarché...

Cinnamon Raisin Bread


I would have to call this my first success with a yeast bread.  It's my second yeast bread ever (I'm not counting Claudia Roden ataïf because they didn't require much).  And I consider this one a success despite the split seam on the top where the raisins are peaking through.  The loaf rose properly, it baked up, turned brown and it's delicious.  Besides, the cracking adds character, right?  And I don't mind if my raisin bread is literally bursting with raisins!  Raisin bread is a favorite around here, which is why it's been on the to-do list for a while.  We've been known to plow through a loaf in one day, even if it is normally the store-bought kind.  This bread smells so wonderful while it's baking up, I gave it less than 24 hours before it was gone and I was just about right.


This is another one from Baking from My Home to Yours, and although Dorrie suggests using it for French toast, or at least for toast, we just didn't have enough self-control to save it for breakfast.  Now I'm really regretting that greedy move.  Oh well, I'll just have to make it again!


Raisin Swirl Bread

For the Bread 

1 packet active dry yeast
1/4 cup sugar, plus a pinch more
1 1/4 cups just barely warm while milk
1/2 stick butter, softened to room temperature
3/4 teaspoon salt
1 large egg
1/4 teaspoon vanilla extract
Zest of 1/2 orange
Pinch of nutmet
3 3/4 to 4 cups flour

For the filling

1 tablespoon sugar
2 teaspoons cinnamon
2 teaspoons cocoa powder (unsweetened)
1 cup moist raisins (steamed and dried if necessary)
3 tablespoons butter softened so it's spreadable.


Put the yeast in a small bowl, add a pinch of sugar and 1/4 cup of the warm milk, stir it together and let it rest for 3 minutes.  It should soften.

In a stand mixer with a paddle attachment, combine the rest of the 1 cup milk, the butter and the 1/4 cup sugar.  Mix on low speed until combine, then add the salt, egg, vanilla, zest and nutmet and continue to stir on low for another minute.  Add the yeast mixture and stir for one minute more.

With the mixer off, add 2 3/4 cups flour and begin mixing again on low speed until the flour is just worked in.  Switch to the dough hook and with the mixer on speed setting 2 beat the dough for a few minutes.  The dough should begin coming together off the sides of the bowl.  If it doesn't add up to 1/4 cup flour on tablespoon at a time until it does.  Kneed the dough for 3 minutes more until it is smooth and shiny.  The dough should be very soft.

In a large buttered bowl, turn out the dough and cover tightly with cling wrap.  In a warm place, allow the dough to double in size, about 1 1/2 hours.  Once fully risen, turn the dough out onto a large piece of cling wrap and either refrigerate overnight,
 or freeze for 30 minutes.

For the filling: Combine the sugar cinnamon and cocoa powder.  Remove your dough from the refrigerator/freezer and on a lightly floured surface with a lightly floured rolling pin, roll the dough out to a 12/18 inch rectangle.  Using your fingers, spread the butter on the bread, then sprinkle with the cinnamon/sugar mixture and finally spread the raisins in an even layer.  

Butter a 9x5" loaf pan.  Roll the dough snugly, beginning with a short end.  Place the dough seam-side down in the loaf pan and tuck the ends under.  Cover with a sheet of parchment or wax paper, put in a warm place and allow to rise for another 45 minutes or so.  

Preheat the oven to 375.  Once the dough is risen, brush the final tablespoon of melted butter over the top, place on a baking sheet and put on the center rack in the oven.  Bake for 20 minutes, then place a piece of tinfoil over the loaf and continue to bake for about another 25 minutes.

Allow to cool in the pan for 5 minutes, then transfer to a cooling rack and bring to room temperature.


*     *     *

Since I finally made a yeast bread, I can finally send something in to Wild Yeast for Yeastspotting!!  So be sure to check out this week (or next week's, I'm not sure if I'm on time for this week's) edition!

Market Day in Marmande


Saturday is big market day in Marmande (Tuesday's market is much smaller). But we were all so busy last Saturday that I had no time to share with you these pictures. So here they are, two days late.
We bought chestnut flavored honey, Lautrec famous pink garlic (see picture), Marmande tomatoes, and plenty of other vegetables and fruit.
Back at Lafitte, we used all these local fresh produce to make a tasty meal.
Marie-Francoise had prepared for us a light snack mixing soft fresh cheese with tuna fish and chopped chives, that she had spread on whole grain bread. What a good idea!

La Fête du Fromage - Le Razégou

About an hour drive northeast of the Minervois, nestled in the spectacular, rugged Haut-Languedoc, is one of the most picturesque villages in the region. Roquebrun has been nicknamed le Petit Nice as it sits smack dab in the middle of a balmy micro climate where citrus trees, cacti and various types of succulents proliferate.


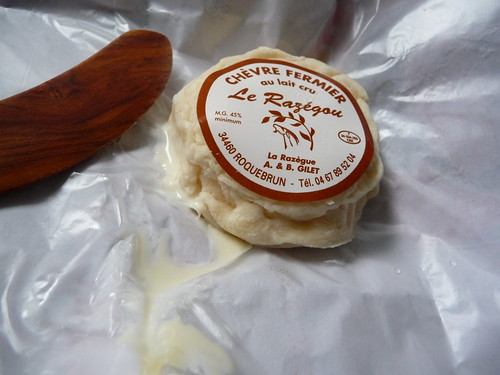
In the rugged Mediterranean scrub land surrounding Roquebrun is a small farm where Le Razégou, un petit fromage de chèvre, is produced.
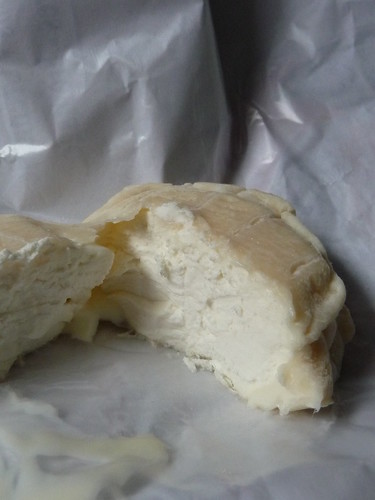
The aroma left no doubt that this was a goat's cheese, and it was obvious that it was a very fresh goat's cheese. Look at how it was oozing when I unwrapped it.

Le Razégou's flavor is very gentle and even though the aroma is heady, the flavor definitely isn't overly "goaty." What struck me the most when I tasted it is how delicate a cheese this is, and how its supple texture literally melts in your mouth.
Delicious!


We tasted it with Confit de Figues aux Noix (Fig and Walnut Jam), a special jam that Betty brought us, which is made to enjoy with fromages de chèvre. It was perfect!

It also paired beautifully with the local red, which has hints of the same garrigue herbs and grasses that are grazed on by the goats in Roquebrun.

Local cheese and local wine. An impeccable match.

Lentil Soup


There comes a time, perhaps after the heaviness of the holidays, when the body craves simple, clean food. At times like these, it seems natural to re-establish a relationship with food based on nourishment rather than indulgence. Perhaps this is why soup is such an appropriate vehicle for leftovers. You can keep your heavy gravy, right now I prefer a clear broth. Although leftovers aren't necessarily involved here, unless you have a hambone to use, as far as light and clear, this definitely fits the bill.

This is the lentil soup of my childhood, the one I've known for as long as I can remember. But that's not the only thing that makes it perfect. It's an old family recipe, passed down from my German great-grandmother. And you don't have to be in the family to recognize how special it is. Everyone who tastes it loves it. It's the kind of homey, warming soup that takes mere moments of actual work, with no stock necessary and few ingredients. There are certain brands my family uses, and while I don't mind toying with recipes, those that have withstood generations should be left alone. So I'll recommend what my family usually does.


While it does include a fair amount of soy sauce, it's not a particularly Asian tasting soup. The soy sauce adds a depth of flavor more than anything else, that ellusive umami that makes savory dishes like this so satisfying. Also, don't be afraid to use the Better than Bullion, in this case, it just somehow works.

Heirloom Lentil Soup

2 1/2 cups lentils - soaked overnight in water just to cover
1 tablespoon salt
2 - 3 bay leaves
5 stalks celecry, chopped
1 large onion, chopped
2 large potatoes, chopped
1 hambone, or 1-4 cup vegetable oil
3 - 4 tablespoons Maggi Seasoning Soy Sauce
2 - 3 teaspoons Better Than Bouillon Beef Base


Combine the first 5 ingredients in a dutch oven and cover with water. Add the vegetable oil, the Maggi and the Better than Bouillon and simmer, covered, for 1 hour. After the first hour, add the potatoes and continue to simmer for one hour more. Season with salt and pepper to taste and serve.

* * *
I'm sending this post in to Ilva of Lucullian Delights (one of my all-time favorite blogs) for this month's edition of The Heart of the Matter, an event that focuses on healthy foods.

Do me a favor?

flower in Asheville
You might have noticed I have not been posting very frequently here. In part it is because I am very busy with work. But I am also going through some very challenging times. And I could use your help.

I don't have ads on my blog and I don't blog here for dollars. I do it because I love doing it and I don't want that to ever change. I want you to enjoy coming here, to learn something, to be entertained. I don't want you to be distracted by ads or think you owe me something. You don't. Perhaps I'm an idiot, but it's just my little corner of the internet and I want to make it a nice and welcoming place. I wouldn't put ads in my home, and this is my home online.

But this week I'd like to ask you to do me a favor and not one penny is required. If you are reading this post, could you think a positive thought for me and for my family? It doesn't have to be a prayer or anything more than "I wish her well" but it would mean a lot to me right now. I promise I'll be back to blogging soon, I just need to take a little break right now.

Les mots et les choses

Words hold such promise.

Yesterday morning I received a spam e-mail from someone named Napoleon Mayo. I deleted it right away, of course, but what a name! Napoleon Mayo. It reminds me of Colonel Mustard. Condiments with military prowess.

Sometimes anthropology is so exciting. Yesterday, while doing some editorial work for the department website, I was faced with a document called “What is

Artisinal Butter & Fleur de Sel Caramels


These little treasures are the best thing anyone ever invented. Just my opinion, of course! In the region of Brittany here in France, they've practically made an art out of making caramel au beurre salé et fleur de sel, as they're called in french. The vrai (real) fleur de sel de Guerande comes from the region also, so it was inevitable that someone thought of adding salt to this sweet concoction. Sucré-salé...sweet-salty, oh what a combination.

I've bought many little boxes of these candies, shared a few along the way....and finally decided to take a crack at making them myself. I don't know what took me so long. It's not really complicated: there are only 5 ingredients (sugar, fleur de sel, crème fraîche, vanilla bean, & salted butter). As for tools, you need a good thermometer, a high temperature spatula & a good cooking pan with high sides.

However, there is one part that's tricky: working with caramalizing, hot sugar at intensely high temperature. Warning! This can be dangerous. But it's certainly manageable if you're careful. You do need to have a cooking pan with high sides so that when you add the cream to the hot caramel, it will not bubble over all over the place....potentially burning you. Instead, all of that hot gooey-ness will stay safely inside your pan!

So, with that little disclaimer in mind, here's the recipe:

Ingredients:
80 g creme (whole fat please!)
1 vanilla bean
250 g sugar
80 g salted butter cut into cubes
2 g fleur de sel

Method:
1. Mis-en-place: weigh out all ingredients, cut vanilla bean in half & scrape off grains with a knife. Get a pan or something ready to put the cooked caramel in (for the last step; below). I used a 9x6 loaf pan. Line it with parchment paper. Or, use a square mold & put parchment paper underneath. Oil sides first if using a metal mold.

2. Caramelize the sugar: put 1/3 of the sugar in a pot that conducts heat well (copper if you have it...), but above all else, make sure the sides are high!! Heat the sugar (dry) until it turns a light brown color & then stir until all sugar is melted. You need to be using a heat-resistant spatula or wooden spoon. Add the next 1/3 quantity of sugar - keep stirring. Make sure the sugar is melted & then add the remaining sugar. Stir. The color will be a nice caramel color. Use a thermometer to monitor the temperature. When it reaches 180°C (356°F), stir in the vanilla bean grains. While you are waiting for the temperature to reach 180°C, heat the cream until it just reaches a boil (don't let it keep boiling). Set a side. (Alternatively, you can heat the cream before you start caramelizing the sugar.)

3. Finish it off: After adding the vanilla bean, add the heated cream & stir. Careful here! When I did this part, it bubbled all-out-of-control-like. A little scary at first, I'll admit. Continue stirring & when temperature drops to 140°C (284°F), remove from stove & stir in butter. Add the fleur de sel & stir.

4. Pour & let set: Pour caramel into whatever you're using. Let it sit at room temperature 2 hours. Once hardened, remove from form and cut into individual pieces. Wrap in wax paper or papier de bons bons.

Note: Next time, I'll try to cook the caramel a little less so that the color is a little lighter....but the flavor is still good, I can assure you!

Voila! Wish I could share some with you.
Five childhood food memories, or the good, the bad, and the ugly

Yes, dear reader, it happened to me too. I’ve been tagged* to write about five food memories from my childhood, and frankly, I can’t resist. Though I’m ambivalent about memes in general—they trigger in me a sort of unspent, pent-up teenage rebellion; I won’t do what you tell me to!—this one presents an all-too-tempting opportunity to revisit a few of the greatest hits, some now thankfully out of

how to spend a lazy summer afternoon...

La Fête du Fromage - Roquefort

I decided this week's cheese was famous enough to warrant it's own little fête.

Voilà Roquefort

Who hasn't heard of it? This very strong cheese seems to garner very strong opinions. People either love it or hate it. Personally, I'm not a huge fan, but I do love to cook with it.

A blue veined cheese from the Causse du Larzac has been enjoyed since the Roman times but it was during the Middle Ages that Charles VI granted a small village in the south of France a monopoly on aging Roquefort in the local caves. It is made from the unpasteurized milk of the Lacaune ewe and matured in the Combalou caves that surround the village of Roquefort-sur-Soulzon in the Aveyron département. The blue veining develops after the rind is pierced forty times and the cheese is left to mature in the caves where the penicillium roqueforti bacteria go to work.

At least three months of aging is necessary under the AOC guidelines, but it is usually allowed to mature for four months. Roquefort is an intensely flavored, distinctively salty and complex cheese. It is crumbly and damp, yet buttery, and melts beautifully on the tongue. The interior is creamy white with blue grey veins and has no rind.
All genuine Roquefort bears a little red sheep on it's label.

Enjoy with a glass of Sauternes or Banyuls.


Caramelized Onion, Roquefort and Parmesan Tart
serves 6

For the Pâte Brisée
  • 18 ounces all-purpose flour
  • 1 ¼ cup, plus 1 tablespoon chilled butter
  • ¼ teaspoon salt
  • ¼ teaspoon cider vinegar
  • 2 large eggs
  1. In the bowl of a food processor fitted with the metal blade, add the flour, butter, and salt.
  2. Pulse several times to form pea-sized lumps.
  3. Add the vinegar and eggs and pulse to form a moist, crumbly mixture. Do not over process.
  4. Turn out the dough onto a work surface and knead a few times by hand.
  5. Form the dough into a disk, wrap the disk in plastic wrap and refrigerate. Will keep refrigerated for up to 3 days or frozen for 1 month.
For the Tart
  • 1 recipe pâte brisée (or store bought puff pastry--follow instructions for pre-baking)
  • 3 tablespoons butter
  • 2 large yellow onions, halved and cut into julienne strips (about 7 cups)
  • 1 cup heavy cream
  • ¼ cup crème fraîche
  • 1 large egg
  • 1 large egg yolk
  • ¾ cup crumbled Roquefort cheese
  • ¼ teaspoon salt
  • ½ teaspoon freshly ground black pepper
  • 3 tablespoons grated Parmesan cheese

Make the tart
  1. Preheat the oven to 325°F (160°C).
  2. Remove the pâte brisée from the refrigerator and when warm enough to be pliable, roll out to about 1/8 inch thick.
  3. Place the brisée into a 10 inch tart mold, fitting it around the bottom and the sides
  4. Bake the shell for 10 to 12 minutes, until lightly golden. Let cool.
  5. In a sauté pan over low heat, melt the butter.
  6. When bubbly, add the onions and cook down for 45 minutes, or until the onions are very brown and sweet, stirring from time to time to prevent the onions from sticking. Let cool.
  7. In a bowl, whisk together the heavy cream, crème fraîche, egg and egg yolk to make a custard.
  8. Stir in the salt and pepper and set aside. (You may want to use less salt, depending on the saltiness of the Roquefort.)
  9. Increase the oven temperature to 375°F (190°C).
  10. Spread the cooked onions on the bottom of the tart shell.
  11. Sprinkle crumbled Roquefort over the onions.
  12. Pour the custard mixture over.
  13. Sprinkle the Parmesan cheese over the top of the custard
  14. Bake for 20-25 minutes, until golden brown.
  15. Serve warm or at room temperature.

Boudin Blanc for Christmas Eve

When I was studying French in high school and college, I learned that Christmas Eve was la veille de Noël. Technically, I suppose, one can say that but I have seldom heard the term. My French friends talk about "le 24" or, more often, "le réveillon", sometimes specifying "le réveillon du 24" in order to distinguish this festivity from the "réveillon du 31." "Le réveillon" is an elaborate holiday evening meal, often served quite late -- after midnight mass for some.

My family celebrates Christmas "entre nous", so only my husband, my two daughters and I are involved in this celebratory supper. I used to put myself out making elaborate dishes, but over the past few years we have adopted "boudin blanc", a plump white sausauge filled with ground chicken, veal or pork mixed with egg, milk and soft bread crumbs. It is generally available in some shape or form all year round, but I make a point of buying it only for the holidays.

My Larousse Gastronomique lists 8 types of boudin blanc in its chart entitled "Characteristics of Different Boudins." The variety I buy from the local butcher, though, contains specks of morel mushrooms and is not mentioned in the Larousse.

Traditionally, boudin blanc is a starter, and it can even be considered a side dish, but for us it is the star of the Christmas Eve meal. I cook the sausages simply, wrapping them individually in aluminum foil and sticking them in a hot oven for 20 minutes. With steamed red potatoes and sautéed apples on the side, they make a quick and festive réveillon meal for a small group.

Al Dente Pasta: Favorite Things


It's no secret that I'm crazy about pasta. I could eat it everyday. Something about the texture of noodles is so appealing to me. I like glutinous chewy noodles, egg noodles, tiny little types like orzo, soup noodles, crispy noodles. I like them all, with the exception of mushy canned pasta like Spaghetti-O's, which incidentally I loved as a child.

While I always have dried pasta on hand, and I buy fresh stuffed pasta from time to time from an Italian deli, sadly I don't eat fresh noodles at home very often. I used to make pasta from scratch, but it was a fair amount of work and messy. I am creeped out by the pasta that comes in those little refrigerated packages from the supermarket. It doesn't really taste all that great and the plastic containers are pumped full of gases to keep the pasta "fresh". Yuck!

Recently I discovered a terrific dried "fresh" pasta made by a pasta freak like myself, Monique Deschaine (who learned how to make it from Marcella Hazan). Just like the pasta I made from scratch, it cooks up in just three minutes. It has that wonderful delicate yet toothsome texture so it's no wonder her company is called "Al Dente". Most importantly it actually tastes fresh.

Deschaine uses only durham flour, semolina and eggs, nothing funky. Her pasta comes in wonderful flavors too like the black squid ink variety I used recently to make a scrumptious seafood dish. It's also a bargain, you can find it in stores for around $5 a package or purchase it online for only $3. In addition you can buy gift packages of pasta that seem custom made for someone like me!

+

Sweet Potato Pear Tzimmes with Pecans and Raisins


Quick and easy is the theme.  And by quick, I don't necessarily mean "takes no time," just "takes no time to prepare."  So roasting a big pan full of sweet potatoes and pears for an hour still qualifies, because the prep time is mere minutes.  On days like these, when I feel guilty for so much as thinking about anything besides this seminar paper (two more days to go!) I tend to just want to throw ingredients together and eat them all day long, no matter if it's a side dish meant to serve six.  Although I realize variety in the diet is important, sometimes I don't necessarily require it every day.  I figure if I've eaten lots of different whole foods throughout the week, that counts.  Justification?  Maybe.  But we're not huge on leftovers here, so we tend to make one thing and finish it.


This recipe comes, again, from my beloved Veganomicon.  If, for some crazy and inexplicable reason I have not yet convinced you to go get this book, here's one more plug.  Every time I open this book I find something I want to make.  And every time it's wonderful.  These recipes appease even the most staunch meat-eater (R), they're creative and they're wonderful.  

Moskowitz admits that this dish could just as easily be called "roasted sweet potatoes and pear" but she sticks with tzimmes.  According to Marc Bouchard in an 2007 article, Tzimmes go back to the Jewish communities of Central Europe, where they tended to be root-vegetable stews simmered in a sweet sauce.  Fresh or dried fruits are often added, in this case fresh pears and raisins.  However, this preparation is not really a stew in the soup sense, but a sheet full of baked fruits and veggies.  If that sounds good to you (and it does to me!) this would also make an excellent Thanksgiving side dish.


Sweet Potato Pear Tzimmes with Pecans and Raisins

2 large sweet potatoes, peeled and cut into cubes
3 firm bartlett pears, seeded and cut into cubes
1 tablespoon vegetable oil
2 tablespoons mirin (sweet cooking wine)
1 tablespoon pure maple syrup
1/2 teaspoon ground cinnamon
1/4 teaspoon salt
3/4 cup pecan halves
3/4 cup raisin

Oven preheated to 350

On a large, rimmed baking sheet, place the sweet potato and pear cubes.  Sprinkle with the rest of the ingredients, reserving the raisins, and gently mix it up so that everything is well coated.

Cover with aluminum foil and bake for 30 minutes.  Remove the foil, add the raisins, mix it all up a little bit, and continue to bake for another 30 minutes, uncovered.  Serve!


*     *     *

I'm sending this off to Mansi at Fun and Food Cafe for her Vegetarian Thanksgiving Recipe Carnival!  I thought this dish was just delicious and would make a lovely addition to any Thanksgiving table!

Suited for each other: rhubarb meringue tart

I am not, by nature, wildly energetic. I’m far from slothful—give or take a few semantic quibbles, of course—but I’ve never been one to wake up with itchy excess energy nagging to be burned. I have just the right amount of oomph to get me happily through the day, and though infamous in certain circles for my speedy stride, I’m really very good at sitting still. I’ve even been known to go

Hau'oli Makahiki Hou (Happy New Year in Hawaiian)


I'm heading off for a brief trip to Oahu and will be back on January 2nd, 2008.

I may or may not be posting about my trip here, but probably will be posting about it for Epicurious. You can always check out my daily posts by clicking on the Epicurious button on your left.

If you have any hot tips or favorite restaurants on Oahu, please feel free to post them in the comments section.

Aloha! (and Mele Kalikimaka to my readers celebrating Christmas)

Amy

If you haven't checked it out recently, head over to KQED's food blog, Bay Area Bites. The site has relaunched with a new look and a new feature--Take 5.

Take 5 features five interview questions with a person involved in the culinary life of the Bay Area. Today's Take 5 focuses on Belinda Leong, the pastry chef at Restaurant Gary Danko. Take a look and let me know what you think! And check back here tomorrow for Is My Blog Burning...

Pumpkin Pie


This pie is really good.  Lick-the-bowl-clean, make-sure-you-have-room-for-seconds good.  Thanksgiving came early for us this year, since I can't make it home for the real deal at the end of the month.  And although we were stuffed just like our dear old turkey, we all managed to make some room for this pie, which had been tempting us with its deep orange hue and buttery, spicy aroma throughout our meal. 

And this opened up to some rave reviews - oohs and aahs from its eaters, and a general fascination by the sweet, tangy, and spicy combination of flavors.  The recipe I provide here shows you how to make your own crust, but of course you can buy a frozen 9-inch pie crust and I'm sure this pie would still taste great; it's the filling that's the winner.

Spiced Pumpkin Pie - serves 6-8

For the crust:
1 3/4 cup flour
1 stick of butter, cut up into smaller pieces
pinch of salt
1 egg yolk
room-temperature water

For the filling:
2/3 cup brown sugar
1/2 cup sugar
1 pinch salt
2 tablespoons flour
1 teaspoon ground ginger
1 teaspoon ground cloves
1 teaspoon ground nutmeg
1 teaspoon cinnamon
12 oz canned pumpkin
1 tablespoon molasses
3 eggs
1 cup heavy cream

1.  To prepare the crust, spread the flour on a work surface and create a well in the center.  Place the salt and butter pieces in the well. 

1. Using a pinching motion, press the butter into the flour, until a mealy combination has formed and the butter is mixed into the flour.
2.  Create another well in the center, and place the egg yolk inside.  Again using a pinching motion, mix the yolk into the flour and butter.
3.  Pour the water over the mixture in small doses, until a ball can be easily formed (you'll probably need around 1/2-cup of water).
4.  Knead the dough several times, and form it into a ball.  Place in plastic wrap and store in the fridge for at least two hours.
Preheat the oven to 425 degrees.
5.  To prepare the filling, whisk the sugars and spices together in a medium bowl.  Add the pumpkin, molasses, eggs and the cream, and whisk thoroughly until combined.
6.  Remove the crust from the fridge and roll it out to cover a 9-inch pie pan.  Cut three or four x's into the bottom of the crust, and remove any overhanging parts of the crust.
7.  Pour the filling inside the pan, and bake for about ten minutes.  Reduce the heat to 325 degrees, and continue to bake until filling is firm, about 45 minutes.


Voila! Tarte de potiron, delicieuse!!

Sugar High Friday #4, or how I got my hands on a pain de Gênes

It was a circuitous route that brought me to le pain de Gênes, the sunny yellow French cake rich with butter, eggs, and almond paste,


and I never would have made it without a former New York cabbie and his Citroën.

It all began one day in the mid-1990s, in the parking lot of an Albertsons grocery store in Oklahoma City. My father, the ever-willing food shopper, paused with his grocery bags to

SPAGHETTI ALLA CARBONARA ITALIAN FOOD PASTA RECIPE homemade YouTube Video VIDEOGULP !

http://www.youtube.com/watch?v=gMFwY5mBCG4endofvid
[starttext]
SPAGHETTI ALLA CARBONARA ITALIAN FOOD PASTA RECIPE homemade YouTube Video VIDEOGULP !

GULP - Spaghetti alla Carbonara is famous Italian dish - World famous for simpleness of ingredients and for strong and spicy taste
HOMEMADE VIDEO Spaghetti alla carbonara ITALIAN FOOD PASTA RECIPE - italian Cooking

Selection YouTube video Videogulp !
[endtext]

Photo du Jour


New growth on the fig trees and a little fig-lette.

Yummy Potatoes: Cookbook Review

Yummy Potatoes


Last week I went through a box of recipes I had clipped from the San Francisco Chronicle. I found recipes dating back to the late 90's! I wish I was as good at organizing as I am at hoarding. Reviewing all those clippings, I can safely say I had saved more recipes written by Marlena Spieler than from anyone else. Spieler has been a writer for the Chronicle for ages and has written tons of cookbooks to boot.

So imagine my pleasure at receiving a review copy of Marlena Spieler's latest book, called Yummy Potatoes 65 Downright Delicious Recipes. And on the same day I posted one of my yummy potato recipes! Potatoes on the brain. I cannot tell you how delectable most of her recipes look! There are Breakfast Potatoes, Tapas, Meze and Antipasti, Soups, Salads, Mashes, Baked, Fried, Sides and a category called "Potatoes for Dinner!" I swear the exclamation point is hers, not mine, but it might as well be mine.

The notes that go with each recipe are filled with wonderful anecdotes like the time she went digging in HRH Prince Charles' garden, or took a class from James Beard and whether it's a story about her Aunt Stellie or her travels through Italy, France or Greece you can't help but wish Marlena were your friend to chat with over a meal. Anecdotes aside, I'll hang onto this book not just for the recipes but also for the inspired combinations like potatoes with lemon juice and olive oil, potatoes and chermoula, potatoes with pasta, tomatoes and cheese and potato enchiladas with red chile sauce. Check out several of the recipe on the Chronicle Books site. Yummy. Potatoes. Indeed!

READ MORE
Over at Bay Area Bites is my review of The Breakaway Cook.

Pizza: Cookbook Review


The Bay Area is not really known for pizza but maybe it should be. After all we are the home of pizza throwing champion Tony Gemignani. No one is more passionate or knowledgeable about pizza than Tony. Perhaps you've seen him on TV doing tricks or teaching others how to toss the dough. He's the captain of the World Pizza Champions and even invented a silicon based glow-in-the-dark pizza dough practice disk called "ProDough". He has a pizzeria out in Castro Valley called Pyzano's Pizzeria and has written a book called not surprisingly, Pizza. He studied at a pizza school in Italy and speaking from personal experience, he makes a great tasting pizza.

Most of my cooking is the quick and easy variety. But every once in a while I take on something that requires a little more planning, a little more time, a little more effort. Not brain surgery by any means, but not one of those I'm-hungry-what's-in-the-fridge meals either. While certain things I won't take on such as croissants or puff pastry, pizza is the perfect candidate. As Tony recently told me, it's not that hard to make. But there are some secrets to getting it right.

The best way to learn Tony's secrets are to get a copy of his terrific book. Pizza is co-writtten by Diane Morgan and has recipes for just about every kind of pizza you might want to try-- traditional Neapolitan style pizzas, New York style pizzas, Chicago style deep-dish pizzas, California style pizzas and even grilled pizzas. If you are serious about making pizza this is a really good book because it goes into detail about all the ingredients and all the techniques, leaving nothing to chance. A real hands-on guide, it is paperback and has flaps to hold the book open in the kitchen. It's available on Amazon for only $12.32, less than a large pizza these days.

Tomorrow read my interview with Tony over at Bay Area Bites and come back here for a contest with fabulous prizes...

+

Wasabi Mayonnaise Salmon Recipe

Wasabi Mayo Salmon
There is an exchange that happens in my household. I ask "what should I make for dinner?" and I hear the refrain "Japanese food." The problem is many of the necessary fresh ingredients for the Japanese food in my repertoire, such as shiso, shiitake or enoki mushrooms, gyoza wrappers, mentaiko, udon, daikon and tuna, are not ingredients I typically have on hand. In fact, I need to go to an Asian specialty store to buy them. But I do have a few recipes that come from one of my favorite cookbooks, Let's Cook Japanese Food! that I can make at a moment's notice. And now I have a another one, salmon with wasabi mayonnaise.

The other day I was looking for Japanese salmon recipes and found one for Sake no Mayonnaisu. I didn't actually have any mayonnaise on hand, but I did have wasabi mayonnaise! Why not use it instead? It was perfect. The mayo protects the salmon from drying out and extends the flavor. I am going to give you the instructions for making it with salmon fillets but you can make it with steaks as well. The basic procedure is to broil it on both sides, then add some mayo--as much or as little as you like, then broil it again slightly and serve. I think you could use other flavored mayo too such as miso mayonnaise or Dijon mustard mayonnaise to good effect.

This is such an easy recipe for salmon, I hesitate to even call it a recipe. But the truth is, we all need a few dead simple options. It's not that cooking takes too much time, but it does take some thinking. This is a recipe for those days when you literally can't think straight.


Wasabi Mayo Salmon, adapted from Let's Cook Japanese Food!
serves 4

4 4-5 ounce fillets of salmon, I used Copper River Coho
1/4 cup wasabi mayonnaise (I like the Trader Joe's brand)
Salt

To prepare the fish, slice a few gashes in the skin, to allow it to crisp up nicely when broiled. Season the fish with salt and allow to rest for at least 10 minutes before cooking.

Preheat your broiler, if necessary. Broil the fillets 4 minutes per 1/2 inch thick, starting skin side up, flipping the fish once during cooking. One to two minutes before the fish is done, top each serving with the mayonnaise and return to the broiler. Serve immediately.

Enjoy!