Photo du Jour


Very early signs of spring in our neighbor's window.

Photo du Jour - Piment d'Espelette


Le Piment d'Espelette

This deep red, flavor-packed pepper from the Basque region of southwest France is so treasured it was given AOC status in 1999. It is grown in a very small area surrounding 10 villages that celebrate with a Piment d'Espelette Festival every October.

The pepper has a sultry, smoky flavor and mild heat so it is often used in place of black pepper in Basque dishes such as Poulet Basquaise.

  • 5 pounds chicken pieces, either whole legs or 1 chicken, cut up into 8 pieces
  • 1/4 cup olive oil
  • 1 small slice Bayonne ham (optional)
  • 3 yellow onions, thinly sliced
  • 2 red peppers, seeds removed and thinly sliced
  • 1 green pepper, seeds removed and thinly sliced
  • 10 garlic cloves, crushed
  • 6 tomatoes, cored and coarsely chopped
  • ½ cup white wine
  • 1 bouquet garni (2 springs of parsley, thyme & bay leaves tied together in green leek leaves)
  • 1 tablespoon sea salt
  • 1 teaspoon Piment d'Espelette

  1. In a large saucepan that will fit all of the chicken comfortably, heat 1/8 cup of olive oil over medium-high heat.
  2. Brown the chicken in the olive oil, about 5 minutes per side. You may have to do this in batches. Remove the chicken from the pan, set aside and drain the fat from the pan.
  3. Add the remaining olive oil to the pan and bring the heat back up to medium-high.
  4. Add onions, bell peppers and garlic, sautée for about 5 minutes. Add the Bayonne ham, the tomatoes, the bouquet garni, the white wine, half of the salt and the Piment d' Espelette, cover and reduce the heat to medium. Let cook for about 15 minutes or until the tomatoes are soft and the liquid has reduced.
  5. Add the chicken, stir everything together, cover and cook until the chicken breasts are done, about 15-20 minutes. Remove the breast pieces and set aside.
  6. Continue cooking the rest of the chicken until done, about 20 minutes. Return the chicken breasts to the pot and warm up, about 3 to 4 minutes.
  7. Discard bouquet garni, taste for salt and Piment d'Espelette and serve.

Serves 6-8

Bleh


I don't want to make any big pronouncements about the demise of Cuisine Quotidienne, but suffice to say that winter is taking its usual toll on me.

I think I may be taking a month or two off from posting here. Winter is by far my busiest time workwise, and with no vacation in sight -- no, I don't get the upcoming two weeks of vacances scolaires -- I think I'll just be keeping my head above water until March or maybe even April.

Take care all, and I promise I'll be back.

Mini-cakes de Sophie


What could be better than "Les Cakes de Sophie"? Mini-cakes de Sophie! As I've mentioned before, "cakes salés", or savory cakes, are all the rage in France, especially since the publication of the above book written by Sophie DuDemaine. The problem is that they have become almost ubiquitous -- about every other dinner party we go to includes a "cake salé", usually served during the apéritif.

I am still a fan of these cakes, and I haven't tried all of the recipes in the book yet, so I will carry on making them. But I like to change the rules a little.

First, I usually serve them as the starter with a lamb's lettuce salad. I find they are too filling for the apéritif; I prefer guests to be hungry when they come to the table.

Second, if I'm making them for a dinner party and not just for the family, I've discovered that making individual cakes in silicone muffin tins makes for a nice presentation. Last weekend I tried out the recipe for "Cake aux courgettes et au chèvre", made with zucchini and goat's cheese. It was delicious and all the guests, especially the children, loved the mini-cake presentation.

If you want to try out your own Sophie cakes and don't live in France, the book has been translated under the title "Sophie's Sweet and Savory Loaves." The recipes are simple yet original, and would give an interesting French touch to your kitchen.

Spicy Vermicelli with White Asparagus and White Wine


The short and sweet season for asparagus, both white and green, has started!  Sunday was the first time I saw them at the "bio" food market, and I believe they will be available for the next 2 or 3 months.  I don't have much to add to this post except to say that I hope you try and make this, because it's easy, vermicelli is awesome, and who doesn't like some spicy pasta once in a while?

I'll just give you a few tips/notes: firstly, the vermicelli I bought came in neat little bundles, one bundle being a serving size for one person.  I believe most vermicelli is sold this way, but if not, then you'll need about two handfuls of vermicelli to make this for yourself.  Secondly, I think white asparagus has a slightly less obvious taste than green asparagus and absorbs white wine better, which is why I used it in this recipe, but I'm sure you could use green asparagus and it would still taste good.  Lastly, I didn't want to use nuts because I wanted to keep this recipe on the lighter side, but you if you'd like, feel free to add some chopped nuts, maybe walnuts, cashews, or hazelnuts, at the same time as the asparagus - I think that would taste great!

Enjoy the springtime, wherever you may be reading this, and have a fantastic day.

Spicy Vermicelli with White Asparagus and White Wine - serves 1

1 tbsp olive oil
1 round (1 bunch) vermicelli noodles
1 tsp chopped fresh ginger
1 clove garlic, chopped
5 white asparagus spears, peeled and stems trimmed
1 pinch cayenne pepper
1/2-cup dry white wine
1 tbsp sliced basil leaves (optional)
grated parmesan (optional)

1.  Bring a small pot of salted water to a boil, and cook vermicelli according to package instructions (usually between 4-8 minutes).  When done, drain and set aside in a bowl.
2.  Heat a large skillet over medium-high heat.  Add the olive oil, garlic, and ginger, and sautée until fragrant, about 30 seconds.
3.  Add the asparagus spears, cayenne pepper, salt and pepper, and sautée until asparagus are slightly softened, about 5 minutes.
4.  Add the white wine, and simmer until most of the alcohol has burned off and the asparagus pieces have softened, about 5 minutes longer.  If the white wine evaporates too quickly and there is none left, add more in small amounts, until there is about 1/4-cup liquid remaining.
5.  Remove the skillet from heat, add the vermicelli, and toss thoroughly to combine.
6.  Top with sliced basil leaves if desired, and grated parmesan.

My Favorite Italian Food

Just thinking about some of my favorite Italian food while I wait (impatiently) to leave for our trip.

Crostini di Fegato
Inslata Caprese
Lagane e Ceci
Spaghetti al Pomodoro
Bucatini all'Amatriciana
Gnocchi
Fiori di Zucca Fritti
Gelato
Granita di Limone


I excpect I'll have many more dishes to add to this list when we return!

So I didn't fool too many people with my quiz. I hope you had fun with it anyway! The Julia Child quote, according to Anne Willian anyway, is

"One of the secrets of cooking is to correct something if you can or live with it if you cannot"

So the correct answer was:

A. live with it if you cannot

Congratulations to Mathy, the grand prize winner, you have won a copy of Julie & Julia by Julie Powell. And to the runner ups, Eric, Sam and Mary Ann, I have nifty tasting spoons for each of you.

Photo du Jour - Local Wine


Several bottles of Languedoc-Roussillon wine enjoyed by several people at lunch last Sunday.

Wine from les Corbières, la Clape (an unfortunate name, I know - but great wine) and from our village in le Minervois.

Spaghetti with Walnuts and Anchovies: Recipe

Spaghetti with Walnuts and Anchovies
Conventional wisdom says a good cookbook is one that allows you to reproduce a given recipe with consistently successful results. Another opinion is that the recipes should be really special, not run-of-the-mill or the best versions of classics. I may be in the minority, but I most appreciate a cookbook that inspires me, gives me good ideas, and points the way. Adventures of an Italian Food Lover is such a cookbook.
Adventures of an Italian Food Lover

Italian food is probably my favorite cuisine. I learned to cook Italian food when I lived in Italy but I've never stopped learning. What I understand best is that Italian cuisine is about balance. It's about just the right amount of sauce and just the right texture to the pasta. It's about high quality ingredients combined, often simply, to create something magical. It's this elegant simplicity and balance of flavors and textures that appeals to me. The perfect combination of ripe tomatoes, luscious mozzarella and basil leaves. No balsamic vinegar, no embellishment. Or melon draped with slices of prosciutto. It's like the well-dressed woman who takes off one thing before she leaves the house. Sophisticated and refined but restrained.

This past weekend I made enchiladas. Roasting and shredding the chicken, making the sauce, stuffing then assembling the enchiladas in baking dishes took the better part of a day. But another meal I made this weekend was equally satisfying and took a fraction of the work and the ingredients. It was Spaghetti with Walnuts and Anchovies, from Adventures of an Italian Food Lover.

It was the second time I made the dish, and I tweaked it a little bit. The combination of ingredients is most important, after that, as with all recipes, find the balance that works for you. Just a few other recipes from the book that I find intriguing include Campari Cocktails with Salami and Figs, Pasta and Bean Salad with Celery Pesto, Leek and Sausage Orzotto, Risotto with Almonds and Broccoli and Baked Cherry Tomatoes.

Spaghetti with Walnuts and Anchovies (adapted from Adventures of an Italian Food Lover)
Serves 2 as a main course, or 4 as a first course

2 Tablespoons olive oil
2 cloves garlic, thinly sliced
3-4 filets of oil packed anchovies
2 Tablespoon chopped walnuts
pinch of chili flakes
3 Tablespoons minced parsley
8 ounces spaghetti

Heat the olive oil over low heat and cook the garlic until it softens and barely begins to color. Add the anchovies and mash until they dissolve into the oil. Add the walnuts, chili and parsley, stir and remove from the heat. Cook the pasta in boiling water until it is 3/4 of the way done.

Drain the pasta and reserve some cooking water. Toss the pasta with the sauce and cook over high heat, adding about 1/3 cup cooking water. Cook, adding more cooking liquid as needed, until the pasta is al dente.

Enjoy!

Photo du Jour


Beautiful carved flowers.

CQ HQ June 2007


In May, my workload generally lightens up, and lately I've had a little more time to deal with my blogs. You may have noticed a few changes on CQ, and I thought I'd give you a little news of where the blog is going and what I've been up to in the kitchen and in cyberspace.

1.) Some of you were kind enough to leave comments about my new blog design, so it's time to give credit where credit is due. CQ and La France Profonde's new templates were designed by Madeline Miller of Made by Madeline, and I know that one of my sidebar pals, Jann of Traveling Food Lady has also treated herself to a Madeline makeover. It is definitely fun to get away from the Blogger template rut. Thanks for a great job, Madeline!

2. May also saw me try my hand at starting a blogging event. My announcement of it on Food Blog S'cool was unceremoniously booted off the site -- I know, I now know, that's not where one announces food blogging events but somehow in my enthusiasm I missed reading that!

The event took place nonetheless. I was the only participant, and I managed to make just one of the five recipes I chose for the first edition of "Mid-month Meal Inspiration."

Other than that, I think we can say the event was a rousing success and I WILL be launching the June version in a few days.

3. I have also decided to give CQ a tad bit of star quality by introducing you all -- at least my readers who don't live in France -- to Cyril Lignac, an up-and-coming young French chef and food show star. His web presence is fairly low-key for the moment, but he just started a cooking magazine -- clearly aimed at a much younger demographic than the one I belong to, ahem -- that I think is great fun. It could even help me get my daughters more interested in cooking, which would be smashing for June because the eldest finishes school next week, so wouldn't making dinners with Cyril's help be a great idea to keep her busy?

I also have another reason to take a special interest in Cyril's career -- can anyone guess?

Baked Asparagus Risotto - No Stirring!

Risotto is one of those dishes that I find particularly easy. I've made it so many times that it's kind of like second nature. And I love its versatility!
There is always some sort of vegetable or leftover meat lurking in the back of the fridge or freezer that I can mix with pearly, fat grains of arborio rice, hot stock and Parmesan to make a hearty meal.

The one thing about risotto is that you have to stand there and stir. And stir.
For about 30 minutes.
Sometimes this can be tedious. Especially when there are more interesting things to do. Like laugh at celebrities on gofugyourself.com read up on world events or study French.


So to give myself more time to be studious and worldly, I have a baked risotto recipe that cuts the amount of time in front of the stove by about two thirds.

The texture is a bit different that stovetop risotto. The grains are softer, not as al dente, but the flavor is wonderful!

Baked Asparagus Risotto
  • 8 ounces/250g thick, smoky bacon, chopped into small pieces
  • 1 onion, chopped
  • 2 tablespoons/25g butter plus 1 tablespoon/12g
  • 10 ounces/300g risotto rice
  • 8 ounces/ 250g fresh asparagus, cut into 1-inch pieces
  • 1/2 cup/125ml of white wine (optional)
  • 3 cups/700ml hot chicken stock
  • pinch salt
  • freshly ground black pepper
  • 1/2 cup/50g Parmesan cheese, grated
Heat oven to 200C/400F
Fry the bacon pieces in an ovenproof pan or casserole dish with a lid for 3-5 minutes until crisp.
Stir in the onion and 2 tablespoons/25g butter and cook for 3-4 minutes until soft.
Add the rice and stir for a minute or two, until all the grains are coated.
Pour in the optional white wine and cook for 2 minutes, until absorbed.

Add the hot stock, the salt and the asparagus pieces, then give it all a quick stir.
Cover with a tight fitting lid and bake for 20-30 minutes, until just cooked.
Stir in half of the Parmesan and remaining butter.
Serve, sprinkled with the remainder of the cheese and pass the pepper mill.

Serves 4

Meet the Editor/Lemon Sugar Biscuits


As of today, I can talk about it. Which is lucky because I am not good at keeping secrets! I am the second guest host/editor at the Dannon Kitchen. I follow in the footsteps of Sara Kate Gillingham-Ryan (editor of the blog Apartment Therapy: The Kitchen) who has provided posts and original recipes since the beginning of the year. Every Monday, from now until the end of June, on the Dannon Kitchen site you'll find new content including a recipe, post and tip written by yours truly.

When Dannon approached me I was really excited about the opportunity because I actually use Dannon yogurt. Their plain yogurt is an all-natural product with live active cultures, no artificial ingredients and no gelatin or other thickeners. I've found its consistency makes it great for baking and cooking. While I rarely buy fruit flavored yogurt, Dannon Fruit on the Bottom did get top honors in a Real Simple taste test a couple of years ago.

Creating 13 new recipes was a great challenge and a lot of fun. It also meant that I posted fewer recipes on this site. Sorry about that! Fortunately Dannon is letting me post the recipes here as well. So, without further ado, the first inaugural recipe, Lemon Sugar Biscuits. I made this recipe so many times I lost count. It's not a traditional biscuit but it sure is good. Check out the full post on the Dannon Kitchen site and you can read my tip for this recipe as well.

Lemon Sugar Biscuits

2 cup all purpose flour
4 tsp. baking powder
1 tsp. ground cardamom (optional)
1 tsp. salt
1/4 cup brown sugar
1/4 cup butter
1 tsp. lemon peel, grated
1 Tbsp. lemon juice
1 cup Dannon® All Natural Plain Yogurt (I used non-fat)
2 tsp. granulated sugar, for biscuit tops

1. Preheat over to 375°F. In a large mixing bowl, whisk together first 5 dry ingredients.
2. Cut butter into the dry ingredients, until mixture resembles cornmeal in texture. Add lemon peel, lemon juice and yogurt. Mix well with a fork.
3. Place dough on a floured board. Knead until smooth and pat out ½-inch thick. Cut round biscuits using a 3-inch cutter.
4. Sprinkle tops with sugar. Place on a greased cookie sheet and bake for 10-15 minutes or until tops are golden brown. Serve hot.
Yield: 10 servings

+

She Doesn't Cook During the Week

At a restaurant dinner last week, a male colleague started singing the praises of his wife's cooking. Intrigued, I asked him if she worked -- she does -- and asked him how she managed to balance her professional life and her cooking life. "Bon, elle ne cuisine quand même pas en semaine," he answered. In other words, of course she doesn't cook during the week. As he explained, during the weekends she was a creative and devoted cook, but during the week, she just prepared "des trucs simples", or simple stuff. The reality of work and activity schedules means that more and more, cooking in France is becoming un loisir, a leisure activity reserved for weekends, vacations and days off -- of which, with their 35-hour workweek, the French have plenty!

Look What I found


Some days I love the streets, well the sidewalks more precisely, of New York.  


And not sidewalks indiscriminately, either.  For example on the sidewalks in my neighborhood, I have to watch vigilantly over my dog while waiting for her to relieve herself so that she doesn't find a chicken bone, choke and die.  However, one of my favorite sidewalks is on the Upper West Side, and it runs in front of Barzini's, a small, specialty foods store with produce capable of changing the most carnivorous, greens-hating mind.  If I had to choose only one reason to love New York, and I wasn't allowed to choose the art museums, then I would pick the profusion of small, specialty and gourmet stores.  Stores where you can get every imaginable ingredient, no matter how exotic.  And because these stores grow out of the communities surrounding them, in New York you can find authentic, ethnic ingredients grouped by neighborhood.  Perhaps this topic warrants a more thorough investigation and future posts.

But for now I thought I'd share what I found at Barzini's, stacked in large crates overflowing the sidewalk.  Look for them in upcoming posts.


Urban Tavern Opening Party

Urban Tavern


I've been to a fair number of parties, and in my experience restaurant parties beat all others, hands down. One of the best I've ever been to was the joint fete for Epic and Waterbar. A lot of the same industry folks were at the opening at Urban Tavern last night. It was a great chance to get a sneak peek, toast to the new restaurant, listen to the Backburner Blues Band, catch up on chef gossip and grab a bite to eat.

So first off, the restaurant is attached to the Hilton on O'Farrell St. I'd call the decor rustic contemporary. The large Doug Owen horse sculpture is a focal point and sets the color palette. The menu features grilled meats with most items in the $15-20 range, casserole dishes for 1, 2 or 4 people such as beef daube, sides of vegetables, potatoes, beans and lentils, salads including duck prosciutto and grilled calamari versions ($9-13) mussels and starters ($9-11) that range from charcuterie to piadini to cold tomato and crab soup. Having only nibbles of party food, I'll be back for more of the fries and aioli, my weakness for the evening.

As far as chef spotting goes, it was quite an evening. The restaurant was packed so I'm sure I missed a few luminaries, but I did see local chefs James Ormsby, Gordon Drysdale, William Werner, Donna Scala, Scott Warner, Chad Newton, Joey Altman, Gerald Hirigoyen, and Laurent Manrique.

On to the gossip, did I hear that a certain chef is opening a patisserie in the City? Or that a much loved chef may be returning to the restaurant scene? Or that another seasoned chef who is recently back in the kitchen is rediscovering his gruffer alter ego? I will neither confirm nor deny. But I will share my favorite overheard line of the evening--"I want to go in the kitchen and see Manrique yell at somebody!"

More Urban Tavern reports:
Yum Diary by Tracie Broom, my editor at SF Station
SF Eater
Yelpers

Note: Because I've been posting less these days, I've added an option for you to subscribe by email.

Photo du Jour


Roman amphorae.

There was a Roman pottery workshop near Narbonne during the 1st and 3rd centuries A.D. that produced amphorae for transporting wine and oil, and other pottery such as tiles, pots and oil lamps. They were exported throughout the Roman empire from the port of Narbonne, then called Narbo Martius, which was founded in 118 B.C.

The Roman road that linked Spain to Italy, the Via Domitia, passed through Narbonne. In the center of town, there is a large section which has been excavated.

There are cafés surrounding the exposed stretch of Roman road. I love watching kids playing on this piece of history.

Ruth Reichl Speaks!


Last year I had the pleasure of hearing Ruth Reichl speak as part of the City Arts and Lectures series. Her third memoir in the series, Garlic and Sapphires had just been published and in addition to reading selections from the book, Reichl shared her favorite cookbooks, told stories of reviewing restaurants in disguise, revealed what it's like running Gourmet magazine and recalled memories of living and eating in the Bay Area in the 1970's.

This evening Ruth Reichl is speaking at A Clean Well-Lighted Place for Books at 7 p.m. Do show up early, her appearance last year was sold out and I'm sure it will be a packed house. If you get there before me, save me a seat!

I have already gobbled up Ruth Reichl's first two memoirs, Tender at the Bone, and Comfort Me with Apples. In each of them Reichl took me into her confidence with deeply personal stories, her warm and witty style and charmed me with her wonderful food writing. Not surprisingly she's just as engaging in person as she is on the page. Now that Garlic and Sapphires is out in paperback it's likely to be my next read.

A Clean Well-Lighted Place for Books
601 Van Ness Ave
San Francisco
415.441.6670

+ +

Photo du Jour - Autumn Leaves


The leaves are beginning to turn. I absolutely love this time of year.

My Post Runneth Over

My last post sure got the comments coming -- and my mind racing.

Thank you for analyzing, supporting, and suggesting. Besides the many cogent comments, I have also received several emails and even a phone call.

Please excuse me for not responding to them individually or immediately -- they represent a lot to reflect upon.

Interestingly, Mimi of French Kitchen in America wrote a similar post within a few days of mine, and received an outpouring of ideas too.

All of this is a lot to think about...so I may not report back directly on your comments until the next CQ HQ in March. In the meantime, I plan to write some posts!

Thanks for your support.

I have been tagged! THis is MY PARIS!

I've been tagged by Karina to do a random meme about Paris! Half souvenirs, half daily life, this is what Paris is to me ...

>> The first monument I discovered when I first visited Paris back in .... 1975 was the Arc du Triomphe, and as I was exiting the metro stairs, as by magic, it got illuminated! >> Parisians love "brocantes", these street fairs where professionals or "brocanteurs" sell old everything, furniture, books, linen, collector's items, and more, (and a lot of junk too). "Antiques" is a more elaborated concept ...

>> Beautiful in all seasons, "la demoiselle", as the Parisian call the Eiffel Tower is a "cliche" favorite that deserves nevertheless admiration and pride...


>> Let it be rugby during the Six Nation Tournment or soccer (football) for the Europe Cup (right now) the French love (to read about) sports; the most sold newspaper in France is L'Equipe, a sports daily.
>> My Paris has plenty of opera, which I learned to love as a child listenting to SODRE. Opera has many faces here, Opera Garnier, Opera Bastille, Theatre de Champs Elysees, and the Chatelet ... most moving experience? Debussy's "Pelleas et Melisande" at the Opera Garnier with Francois Le Roux (so unexpected!) as Golaud.

>> Wine is an art here ... and I have learend to undertsand it - a little tiny bit - with the help of an Oenology course I too this year at the Universiy of Angers in the Loire Wine Country.
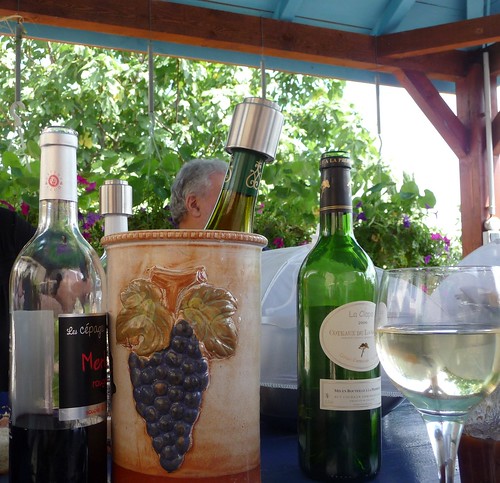
>> and cheeses are plenty. Over 350 different types ... one per day of the year ...
>> open markets is something I miss when I am in countries where they do not exist. Parisian open markets are a true regal, you can get the freshest produce ..

>> a taste of things gone ... like this sharpener mobile stand for your knives and scisors that goes from market to market ...
And you?

Terrine de Foie Gras Mi-Cuit

It's been said that making a good terrine de foie gras mi-cuit is actually very simple. You only need to control two things:
  1. The quality of the foie gras (livers)
  2. The cooking of it (temperature & time).
That simple, eh? Almost. It's the control of the cooking temperature & time where I ran into a few surprises. Once you understand those variables, however, it actually can be simple to do at home. What's more, it doesn't have to be scary anymore. For anyone making a terrine of foie gras, it's a small investment. To fill a terrine the size of mine, I need to buy two 2 foies gras, each weighing about 600g, and that puts me out around 50 euros, or $75. It's pretty nerve-wrecking to think of the possibility of not doing it right when so much money is at stake. So this post is for anyone who is already familiar with terrine de foie gras, has already worked with it before and might be interested to see another experience. No step-by-step recipe this time! (but let me know if there's any interest in that).

There are several different techniques for cooking a terrine of foie gras (sous-vide, poaching, oven, and en croute de sel or in salt) and each has its own little quirks, or I should say, "ways of doing it". At Ecole Ferrandi we learned how to cook terrines using the sous-vide method (under vacuum pak), and it didn't even have to be in a terrine per se. It could be wrapped in plastic wrap like a sausage & put in a sous-vide sac & then cooked to 66°C in a bain marie. At a two-Michelin star restaurant where I worked last year, the foie gras lobes were poached in goose fat to a temperature of 40°C and then stored for a long time before serving. See how variable it can be?

So what about cooking a terrine of foie gras at home? Seeing as we don't have a sous-vide machine....how do I best cook a terrine in my regular, old oven?

Let me share with you my recent experience. First the easy part: I prepared my foies de canard (duck livers) by de-nerving them & marinating them overnight in white port wine, cognac & some "foie gras spices" (typically lots of salt, pepper, some sugar, and 4-spices). Then I put it in the terrine. Now comes the tricky part: actually cooking it! A very reliable reference book of mine said to preheat the oven to 150°C & to cook the terrine in a bain marie for 20 minutes. It sounds so easy, doesn't it?! Well, it's not as straight forward as that. I came across the following variables which I believe impacted my actual cooking time.
  • Oven temperature. Differences in temp do exist and size matters! A reading of 150°C was actually 165°C inside the oven. This is easily corrected, but something to be aware of and to check. As for size, when I open the door of my small oven, the temperature drop is much more significant than when I open the door of a large commercial oven. So, when I'm messing around with my terrine & bain marie here at home, I've got to be quick! This is probably only something to consider if you keep opening & closing the oven, like I did, when my terrine wouldn't finish cooking!
  • Bain marie. Make sure your water is hot before you put your terrine in the bain marie! Using water from the tap without heating it will extend the cooking time considerably. My reference book doesn't say anything about this, but from experience I knew the water needed to be hot. Even then, I don't think it was hot enough. Next time I'll make sure it is ~ 70°C.
  • Type of terrine you're using. Ceramic, cast iron, or glass - the type of material used will impact how long you cook your terrine. A cast iron terrine will take longer to come up to temperature in the bain marie than say glass or ceramic ones. Mine is cast iron. And I had stored it in the fridge before cooking it. Imagine what it did to the water temperature of the bain marie, and therefore the cooking time. Trust me, it lengthens it!
OK, with all of these factors noted, what happened? Well, my timer went off after 20 minutes & theoretically, my terrine should have been done, like my book said. Luckily, I have a very reliable food thermometer & I measured the temperature at the center of the terrine. It read 13°C!! That means it was cold on the inside (13°C = 55°F)! I promptly put it back in the oven and re-checked the temperature every 10 minutes. Each time, I opened & closed the oven & messed around with my water bath & terrine which are not really sized to fit together perfectly! Imagine water sloshing around a bit...and a slight awkwardness with handling...(we have very small ovens here and my roasting pan just barely fits)...so the bottom line is that some oven temperature variation was inevitable...!

In the end it took me a total of 45 minutes. I removed the terrine from the oven when the temperature at center measured 30°C. At this point, my terrine looked like the one pictured in my reference book (ie, a good layer of melted yellow duck fat on top of the terrine), and as the book said, it may look undercooked, but that's the way it's supposed to be. I only wish I had a picture of it at that point. Too bad!

I removed the terrine from the bain marie, and let it sit on the counter top where it did continue to cook a bit. So, that reminds me that there's actually one last factor: the rate at which you cool down your terrine. At school, we cooked it until the center temperature was 66°C, but we immediately stopped the cooking by cold shocking it into an ice bath. Here at home, I let it sit on the counter a few hours.

I put weights on top to compress it. After a while, I removed them, wrapped the terrine in plastic and then let it rest in the fridge 3 days. (Letting it rest 3 days is critical.) Only then would I know how well it was cooked , or not. And, I'm relieved to say that it turned out delicious! Honestly, I wasn't sure if 30°C would actually be a good end temperature or not. It's just that my terrine looked like the picture of the terrine in my book. Unfortunately, my book doesn't define a target end temperature. I later read a few other blogs and found one that says to remove it at 38°C... so I leave it up to you to decide when you want to pull yours out of the oven!

My conclusions: (1) You're bound to run into variables that will affect the cooking process of a terrine of foie gras in the oven, and its successfulness. But, that shouldn't throw you off, if you're aware of the variables, and if you're able to adjust yourself to them. Blindly following a recipe without taking into account variables can lead to disaster no matter what you're preparing. And when you're cooking something costing a small fortune, it's even more important to pay attention to what you're doing. An overcooked terrine is simply a waste of money. I've done that before. Let me just say that it makes me not nice to be around for a few hours! You end up with a lot of rendered duck fat since most of the foie is melted away. What's left is a minuscule terrine. Still edible, but minuscule. An undercooked terrine is equally bad - it will look unappetizing (too pink/red) & that's enough to make it a turn-off. Plus, it is probably not the safest, bacterially-speaking. (2) Make sure you have a good food thermometer so that you can measure the temperature at the heart of the terrine. For me this is key to making a good terrine of foie gras, especially for beginners. Because this way, no matter what variable is thrown your way, you'll have a way to reassure yourself that it's going to be OK. (3) Finally, think about how these variables can occur, and try to mitigate them in the first place....then you'll really be on the road to cooking like a pro! Because after all, these are the same principles used in a professional kitchen for cooking n'importe quoi (no matter what)!

So voilà! I share the lessons I learned recently about making a terrine of foie gras at home. Long-winded, but hopefully, helpful. This one's for you Robbin! And please let me know what you've experienced in doing this yourself.

Tea Smoked Chicken:Recipe


I am a tea drinker. I love just about everything to do with tea, I am especially captivated by the ritual of tea. You might think I mean the Japanese tea ceremony, but actually I find the western rituals of tea making and drinking, while nowhere near as aesthetic or intellectual a pursuit, equally appealing.

It seems like such a simple thing to make tea, and in a way it is--you boil water and steep the tea leaves then pour it--but each of those steps if done improperly can make a dreadful libation. The water needs to be fresh, the temperature should be boiling or just under the boil for some types of tea, like green tea. The amount of tea is also crucial. I find that I need to use much less tea than is usually called for to make a good pot of tea. Too much tea in the pot (I steep it in a fine mesh strainer) can make the tea bitter and so too can steeping for too long. Each tea is slightly different and you need to find out just how much time works for each. The longest I steep tea is with Darjeeling and it steeps for 6 minutes. Most black teas I steep for 3-5 minutes. Green teas even less.

I am also intrigued by the idea of cooking with tea. Not things to serve with tea, mind you, but actually using tea as an ingredient. Recently I have been experimenting with tea smoking chicken and this is how I do it:

Tea Smoked Chicken
2 large or 3 small skinless boneless chicken breasts, rubbed with
1 Tablespoon sugar
1 teaspoon salt

1/4 Cup Lapsang Souchong tea (you could experiment with other types, any black tea should work, the stronger the better)
1/4 Cup jasmine rice
1/4 Cup brown sugar

Line a wok or heavy large flat saucepan (not nonstick) with tin foil. Let the excess drape out, you will need it later. Combine the tea, rice, and sugar. Spread out mixture evenly in the center of the tin foil. Place a rack over the tea mixture or form a "snake" out of tinfoil to put around the tea. Heat pan or wok over high heat.

When the mix begins to smoke, place chicken on rack or a piece of punctured tin foil over the tea (balanced on the snake). Cover with lid (if you wrap the lid in tin foil too there will be no clean up whatsoever to this recipe, other than throwing out masses of tin foil) and fold the foil you have sticking out of the pan up over the lid to seal - you want to keep the smoke in. Smoke for 15 minutes.

When the chicken cools it can be shredded to make a great Asian style chicken salad.

If you too want to try using tea as an ingredient, check out the web sites of Celestial Seasonings and Stash which each have lots of interesting tea recipes to get you started experimenting.

Chilaquiles


Yesterday we went to Cancun for dinner. Well, actually our flight to Merida did not leave until this morning so we spent the night in Ciudad Cancun. The hotel was right across the street from Sanborns Cafe.


Sanborns which started out as a pharmacy I believe, is now a huge retail holding company. The original had an adjoining restaurant and is located in a elegant building in Mexico City. It is famous for having invented Enchiladas Suizas and in my opinion they make the best chilaquiles anywhere. I have eaten at Sanborns in 2 locations in Mexico City and now in Cancun.


Chilaquiles is a dish made up of yesterdays tortillas. They are fried and kind of stewed with a red or green sauce, and often some chicken or beans. They are topped with cheese and a dab of crema. I do not know what the American equivelant is--it is not quite hash or bread pudding, but it is so rich and creamy and delicious it is irrestistable. So is Mexico.


Today we are in the white city, Merida. The capital of Yucatan, it is a major shopping hub and the central market is a labyrinth of alleys and passageways to explore and get lost in. Most unusual were packets of spices and dried herbs that I truly could not recognize. I may have to buy some just to investiage further...

Photo du Jour - French Pastry


Une tresse aux pépites de chocolat.

Rich, flaky, buttery, chocolaty and utterly delicious!

Millet and Sweet Potato Cakes

sweet potato millet patties (1 of 1)

It seems like every Sunday evening R and I say to one another, okay. Starting Monday, we're only going to eat healthy. Actually, I don't really believe in only eating healthy, but it's good to start each week with the best intentions I suppose. Another thing is that I'm not really all that into diet books. I don't like the lists of 'good' and 'bad' foods (since when is food a moral question, anyway?) and I don't like all the rules. Oh, and flavor. I don't like the lack of flavor.

But I do like to cook with real food. I love real food. Because real food is colorful and interesting and flavorful, and healthy almost as an afterthought. After a couple of serious successes with Prevention Magazine's recipes (this watermelon tomato salad comes to mind as something I will most likely be craving through the winter), I decided to give one of their cookbooks a try, especially since they're, like, 1 penny on Amazon. The books form a series called 'Eat Up Slim Down' but even if slimming down isn't really on the radar for you, these Sweet Potato and Millet Cakes sure as heck should be. Here's why.

sweet potato millet patties 2 (1 of 1)

Millet is a delicious whole grain, not overly assertive (less so than, say, quinoa) and it soaks up the stock and holds everything together. Makes the cakes filling as well. Here's another reason. Every normal person I know loves sweet potatoes. I mean, they're the candy of the vegetable world. But not R. R claims to hate them. Until he tried these, which he devoured. Seriously, and I wouldn't lie to you, these patties are so good that they easily come out as my favorite vegetarian patty ever. You should probably try them as soon as you find Millet (try Whole Foods). This recipe makes enough to feed two very, very hungry people who were too lazy to cook much else. Otherwise they can be stretch to feed 4 I would think, if you serve a couple of sides.

Millet and Sweet Potato Cakes
Adopted from Eat Up Slim Down Annual Recipes 2009

1 cup vegetable broth
1/3 cup millet
1 small sweet potato, peeled and shredded
1/4 cup mined onion (that's about 1/4 a medium-sized onion)
2 eggs, lightly beaten
1 tablespoon all-purpose flour
1/2 teaspoon dried thyme (you can always use fresh if you have it)
1/8 teaspoon crushed red pepper flakes
Salt and pepper to taste

Bring the millet and the broth to a boil in a small saucepan over medium heat. When it boils, reduce the heat to low, cover the pot and simmer the grain for about 20 minutes. You might need to check the level of the liquid to be sure it doesn't dry up and burn. You know, like rice. The millet will be tender when done.

In a medium sized bowl, stir together the sweet potato, onion, eggs, flour, thyme, pepper flakes and salt and pepper. When the millet is done, add it to the potato mixture and toss until everything is well-blended.

Heat a large saute pan and add either oil or cooking spray. Heat over medium-high and drop spoonfuls of the potato mixture into the pan. Flatten a bit into a patty shape and cook for about 6-7 minutes total, with a flip of the patty in the middle.

UPDATE: There was a typo in this recipe: 1.3 cup millet should have been 1/3 cup millet. I've changed it.

On soufflé and trepidation

In this world, there are plenty of things to be afraid of, but soufflé is not one of them. We know all too well the horror of a natural disaster, the freak accident, the uncertainty of change, the fearful dwindling of the bank-account balance, the sleep lost to worries and wondering. For me, there’s a special terror reserved for the blast of a tornado warning siren: evidently, my Great Plains

Balsamic Onion and Polenta Cake

onion polenta cake_

So you know sometimes when you have a bunch of flavors kind of bumbling around in your head, and maybe odds and ends in the pantry you haven't looked at lately. And sometimes the two mix and create strange cravings, or at least, impulses. That's all to say that I made this one up. Not out of whole cloth or anything, there's really no reinventing the wheel when it comes to cooking. I mean, if a particular combination works, chances are it's been discovered before now. But I had a feeling this would be good, and it was. And the proof is that I ate it. As in I ate the whole thing. In one day. With No help. Granted, I ate it for breakfast, lunch and dinner, so it's not as excessive as all that. Okay, it's still pretty excessive. But part of the reason for it's creation in the first place was my not wanting to go to the store. So I didn't, and I'm full, and that's how it worked out.

onion polenta cake final

This is a Vinegar-Caramelized Onion Upside Down Polenta Cake. Or, it's an Onion Tart Tatin, with Polenta instead of puff pastry. Or it's a mess of Balsamic Glazed Onions with a coating of Gruyere-spiked polenta to string them together. I've never been one much for titles. My dissertation is still called merely "Andrea's Dissertation in Progress" with no colon to separate the snazy part from the academic elaboration part. When Onions and Polenta Meet: A Study in Savory Cakes, for example. Anyway.

onion polenta cake 2


Remember the Balsamic Roasted Onions I told you about maybe a week or so ago? I still had onions kicking around, and one go at the recipe left me with a well-developed taste for them. I have a friend, let's call her J, who told me once that she wasn't interested in trying any new foods because she didn't need additional things to crave. That's what happened here. Additional things. So I thought, let's gussy these little red onions up a bit and give them their own bed of baked polenta to roll around in. Yes, polenta with cheese mixed in of course, baked into a savory crust.

Now, I have to admit to you that there was one side of the cake that didn't get as much polenta as it should have, and wasn't able to hold up its end of the deal. So a couple of onion wedges got loose and kind of rolled to one side. I think this problem would be solved by using an additional 1/2 cup of polenta to begin with. So I'll add that into the recipe. This is a particular method for polenta which negates the need to stir constantly. You won't end up with the perfectly creamy porridge of the labor-intense sort, but it's perfect for baking. Otherwise, this thing is rustic. It is not your perfectly shaped tart tatin, because 1) I am not French and so lack the necessary finesse to achieve it 2) we're using polenta and not a sheet of puff pastry which can be neatly folded down over the edges of whatever it encases. But if that's okay with you, it's certainly okay with me.

Onion and Polenta Upside Down Cake

For the onions:

3 large red onions
Olive oil for the pan
Salt and pepper for seasoning
2 cloves garlic, passed through a press or minced
1 teaspoon fresh thyme, finely chopped
1/4 cup balsamic vinegar, divided in half

Preheat the oven to 450 F. Peel the onions and cut them into quarter or thick wedges. Be sure to keep the root end attached so they don't break apart. In an ovenproof 10" pan, heat the oil over medium-high or even high heat, add the onions, and cook them over the heat reduced to medium until they're brown on both sides. This will take 5-10 minutes. Season with the salt and pepper, then add the garlic and cook until it's light brown. Mere moments, really. Add the thyme, and then three tablespoons of the vinegar and toss the onions to coat them well. Be careful with this adding the vinegar part, because it can splatter.

Be sure that your onions are in one layer. They should fit snuggly together, in what would normally be considered an over-crowded pan. Remove the onions from the heat and set aside while you finish the polenta.

Drizzle the last tablespoon of vinegar over the onions before adding the polenta. Set aside

For the polenta:

1 1/2 cups polenta, the slow cooking kind (try Bob's Red Mill if you're having trouble finding it)
5 cups water
1 cup grated gruyere cheese
¾ teaspoon salt

Mix the salt into the polenta in the top of a double boiler. Bring all of the water to a boil in the bottom of the double boiler, then stir 2 cups of the water slowly into the cornmeal until well combined. Add the remaining water and stir well, leaving about 2 inches of water in the bottom of the double boiler. Place the top of the double boiler over the bottom and cover. Cook for about 20 minutes, stirring occasionally. Be sure that the bottom of the double boiler doesn't dry out.

When the polenta is done, or nearly so, stir the cheese into it. Cover the onions with the polenta. You’ll have to do some patch work here, but just be sure the onions are covered and that the polenta encases them around the edges. Bake for 20 minutes in an oven preheated to 450 F.

When the polenta is crusty on top, remove form the oven and let sit for a couple of minutes before inverting onto a serving plate.

La Fête du Fromage

One of the mobile fromageries that come to the Olonzac market is owned by a pair of friendly and gregarious guys who I find very helpful in my quest for new cheeses to try. Last week I stopped by their truck to have a chat with them and taste a few samples. I ended up falling in love with and buying a cheese that they called Fromage de Trois Laits and some Bethmale, which I've already tasted and written about.


The lush Fromage de Trois Laits was a rich mélange of unpasteurized cow, goat and sheep's milk that was produced in the Pyrénées mountains where it was aged for a minimum of four months. I did a bit of research on this cheese and found several types of cheese from the Pyrénées that were a mixture of cow and sheep milk, called Mixte, or sheep and goat milk, but not all three. Anyone ever heard of it?
It had a dense and creamy texture that I thought was just perfect! The flavor was sweet, buttery, mildly salty and very voluptuous. If you can get a hold of some Fromage de Trois Laits, you must try it!
A glass of Graves sec or a Jurançon sec would compliment this cheese nicely.

Photo du Jour - République Française


Carving above the fountain at the edge of the village.

Orange Pecan Cinnamon Buns:Recipe


Fresh popped popcorn, barbecue, cinnamon buns. You know what I'm getting at, right? Some foods smell so good you just have to have them. Scientists tell us that our sense of smell is the strongest memory trigger, though I think in this case it just triggers the memory of how good these things taste.

I have never made cinnamon buns before because making a dough with yeast seemed like too much bother. But in the January 2005 issue of Bon Appetit magazine there was a recipe for cinnamon buns using buttermilk, baking soda and baking powder for leavening. Perfect!

I love the R.S.V.P. section of Bon Appetit. It's where readers request their favorite recipes, it's my turn-to-first section. Too often the pound of butter, the pint of cream or the 8 egg yolks are why the cookies, chowder or cake tasted so good in the first place. But not this recipe. As usual I have significantly changed it to make it "better". Here is my version:

Orange Pecan Cinnamon Buns
Makes 4 large buns
Filling
1/2 Cup dark brown sugar, packed
1/2 Cup toasted chopped pecans
1 teaspoon grated orange peel
1 teaspoon cinnamon
pinch salt
1 Tablespoon melted unsalted butter

Dough
1 1/4 Cup flour
1 Tablespoon sugar
1/2 teaspoon baking soda
1/2 teaspoon baking powder
pinch salt
1/2 cup buttermilk
5 Tablespoon melted butter (reserve 2 Tablespoon separate)

Icing
3/4 Cup powdered sugar
1 Tablespoon buttermilk
1 Tablespoon orange juice

Filling:
Combine all the ingredients

Icing:
Whisk sugar and liquids thoroughly to combine

Dough:
Preheat oven to 425 degrees. Butter an 8-inch baking pan with cooking spray. Combine all the dry ingredients and mix in the buttermilk and 3 tablespoons of the melted butter. Mix the dough and knead on a floured surface, adding more flour if necessary if the dough is too sticky.

Roll out to about 8x5. Brush dough with one tablespoon of butter and sprinkle with the filling leaving a 1-inch border on one long side. Press the filling firmly into the dough. Roll up tightly jelly-roll style starting with the end opposite the plain border. Seal pinching with the plain border edge. Cut into four or five big slices. Place each piece in the buttered pan, spacing slightly apart from each other. Brush tops with remaining butter. Bake 22 minutes or until golden brown. Cool, then drizzle with icing. For heaven's sake don't wait for them to cool completely! Eat them warm.

Enjoy!

Bubble Tea


Bubble tea. Have you tried it yet? Maybe you've heard it called milk tea or tapioca tea or pearl tea. It's also been called boba tea (boba means big breasts in Cantonese). This stuff has really taken off in San Francisco and the fad is now spreading across the country. You can find little Asian shops all over town that sell it.


This chilled tea comes in all different flavors, colors and in different formulas all non-carbonated and non-alcoholic. The flavors are tropical. Most are a mixture of tea, syrup flavoring and milk. I tried lychee green tea this afternoon without the milk and it was very refreshing. It's a lot less sweet than soda but sweeter than you might be used to for tea. It comes with a huge straw to accomodate the optional big black tapioca pearls that sink to the bottom of the cup. Tapioca pearls are gummy and flavorless but add some textural interest to the drink.


From what I have read bubble tea originally came from Taipei, Taiwan sometime in the 1980's where like so many other parts of Asia it's often quite hot and humid. It then took off and became popular all over Asia coming to the US a few years ago, mainly the west coast.


Here's something else I discovered. The name "bubble" doesn't refer to the tapioca balls but the foam on the drink--like a martini it must be shaken, never stirred. Personally I'm not sure I believe this. What I do believe, is that if you are looking to try something new that refreshes better than soda on a hot day, bubble tea is the ticket.

Sara Foster's Molasses Brown Bread


This recipe comes from The Foster's Market Cookbook by Sara Foster.  You may recognize her name from the June issue of Bon Appetite, or, if you're in the Durham/Chapel Hill area as the owner of Foster's Market.  This book has been on my radar for a while now, but it wasn't until Julie of Peanut Butter and Julie suggested I check it out that I finally did.  (By the way, have you been over to Julie's blog yet?  If not, go now! Well, finish this post, and then go.  She's got great recipes and hints and tricks at the beginning of each. Her blog is a gold-mine, seriously.)  Anyway, I don't actually know Ms. Foster (as Julie does, lucky girl!), but she has quite a c.v.  Catering for Martha Stewart (who wrote the forward to her book), cooking at Charcuterie in SoHo (now closed), and working with Jonathan Waxman (who's book A Great American Cook I have used quite a bit and hope to profile here soon), all before striking out on her own with the immensely popular Foster's Market. 

Since I've never been to the actual Foster's, I can only describe her food based on what I've seen in the book.  To that end, I'd say she has a way with creative, but very homey food, based on fresh ingredients (is that a little bit of California coming through?!) and inventive twists on the classics.  


For my first foray into the book, I chose to make this Molasses Brown Bread, a quick bread which Ms. Foster likens to an Irish brown bread.  Don't be fooled by the molasses, however, this is a savory bread, one which we've already smothered in honey, slathered with raspberry jam and filled with sandwich fixings.  I'd say it definitely lives up to Foster's description of it as being "incredibly versatile."  Her recipe calls for 2 9x5" loaf pans, but I only have one.  So instead, I made one normal loaf and a bunch of mini loaves.  Actually, I really loved the minis, they were just the right size, split in half, for sandwiches and you get a high crust to crumb ratio, which is always a bonus.  If you go the mini rout, they only take about 25 minutes to bake.


(Who is that little sneaker? Stealthy this one, isn't she!)

Molasses Brown Bread

3 1/2 cups whole-wheat flour
1 cup all-purpose flour
2 teaspoons salt
1 tablespoon baking soda
1 large egg
1/2 cup sugar
3/4 cup molasses
3 cup buttermilk

Oven preheated to 375, grease your pans (this recipe makes enough for two 9x5" loaves, or one loaf and a tray a minis).

Mix the flours, salt and baking soda in a large bowl.  Whisk the egg, sugar, molasses and buttermilk in another bowl until well combined.  Add the egg mixture to the flour mixture and combine just until everything is well blended.  Pour the mixture into your prepared pans and bake 40-45 minutes for a 9x5" loaf and 25-30 minutes for the minis.  The toothpick text will tell you when they're done.  

Let your bread rest for around 15 minutes before removing from the pans.  Enjoy!


*     *     *

The fiancé and I both really loved this bread.  We managed to polish off all of the minis in half a day!  I found it was perfect dipping bread for the rest of the gazpacho and he ate little sandwiches all day long.  


A Taste of Shanghai


Shanghai is in the news. A lot. It's in the financial headlines and seems to come up often in discussions about restaurants and food. Back in March when I went to hear Gourmet magazine editor Ruth Reichl speak she talked about "an obsession with the regional cuisine of China" that is influencing the restaurants of the world and she mentioned Shanghai in particular. I have to admit, that got me thinking.

I love Chinese food and am always eager to learn and taste more. So when I got a review copy of Richard Wong's Modern Asian Flavors--A Taste of Shanghai I couldn't wait to meet the author and interview him for Bay Area Bites.

Richard Wong grew up in Shanghai and left during the Cultural Revolution. He learned to cook from his mother, aunts and most importantly perhaps, his grandmother. In this country he cooked for his friends and created Chinablue a line of sauces, glazes, oils and dressings based on specific dishes. In turn his friends used the sauces in their own ways creating new and memorable dishes that Wong has written up in his book.

Talking to Wong and reading Modern Asian Flavors helped prepare me for my recent dinner at Jai Yun (more on that soon). I could recognize the Shanghainese dishes based on what I learned from Wong and his book about the flavor and style of this amazing cuisine. There is a subtlty and lightness to Shanghai cuisine. Sauces are not overwhelming and there is a charactaristic sweetness. There is also a saltiness, which comes from the use of preserved vegetables and salted meats. The cuisine is influenced by the coastal provinces of Jiangsu and Zhejiang so seafood is very common and because the Shanghainese are not big eaters, portions are small by Chinese standards.

Wong's recipes are easy to prepare and combine flavors like anise, sesame, ginger and scallion. I have a feeling sauces like Tangy Ginger Sauce, Sweet Scallion Sauce and even Sweet Soy Sauce may become staples in my kitchen. Next week I'll have a review of the book and reprint a recipe over at Bay Area Bites.

READ MORE
Over at Bay Area Bites is my interview with Richard Wong, founder of Chinablue and author of Modern Asian Flavors.